Getting married really put a damper on our home-improving. Mostly because of the time. Oh yeah, and the money. We were definitely strapped for cash.
But after the dust settled (and we were officially Mr. & Mrs.), we had enough cash left over for a project we had been really, really, really wanting to do ….

Remember these babies?
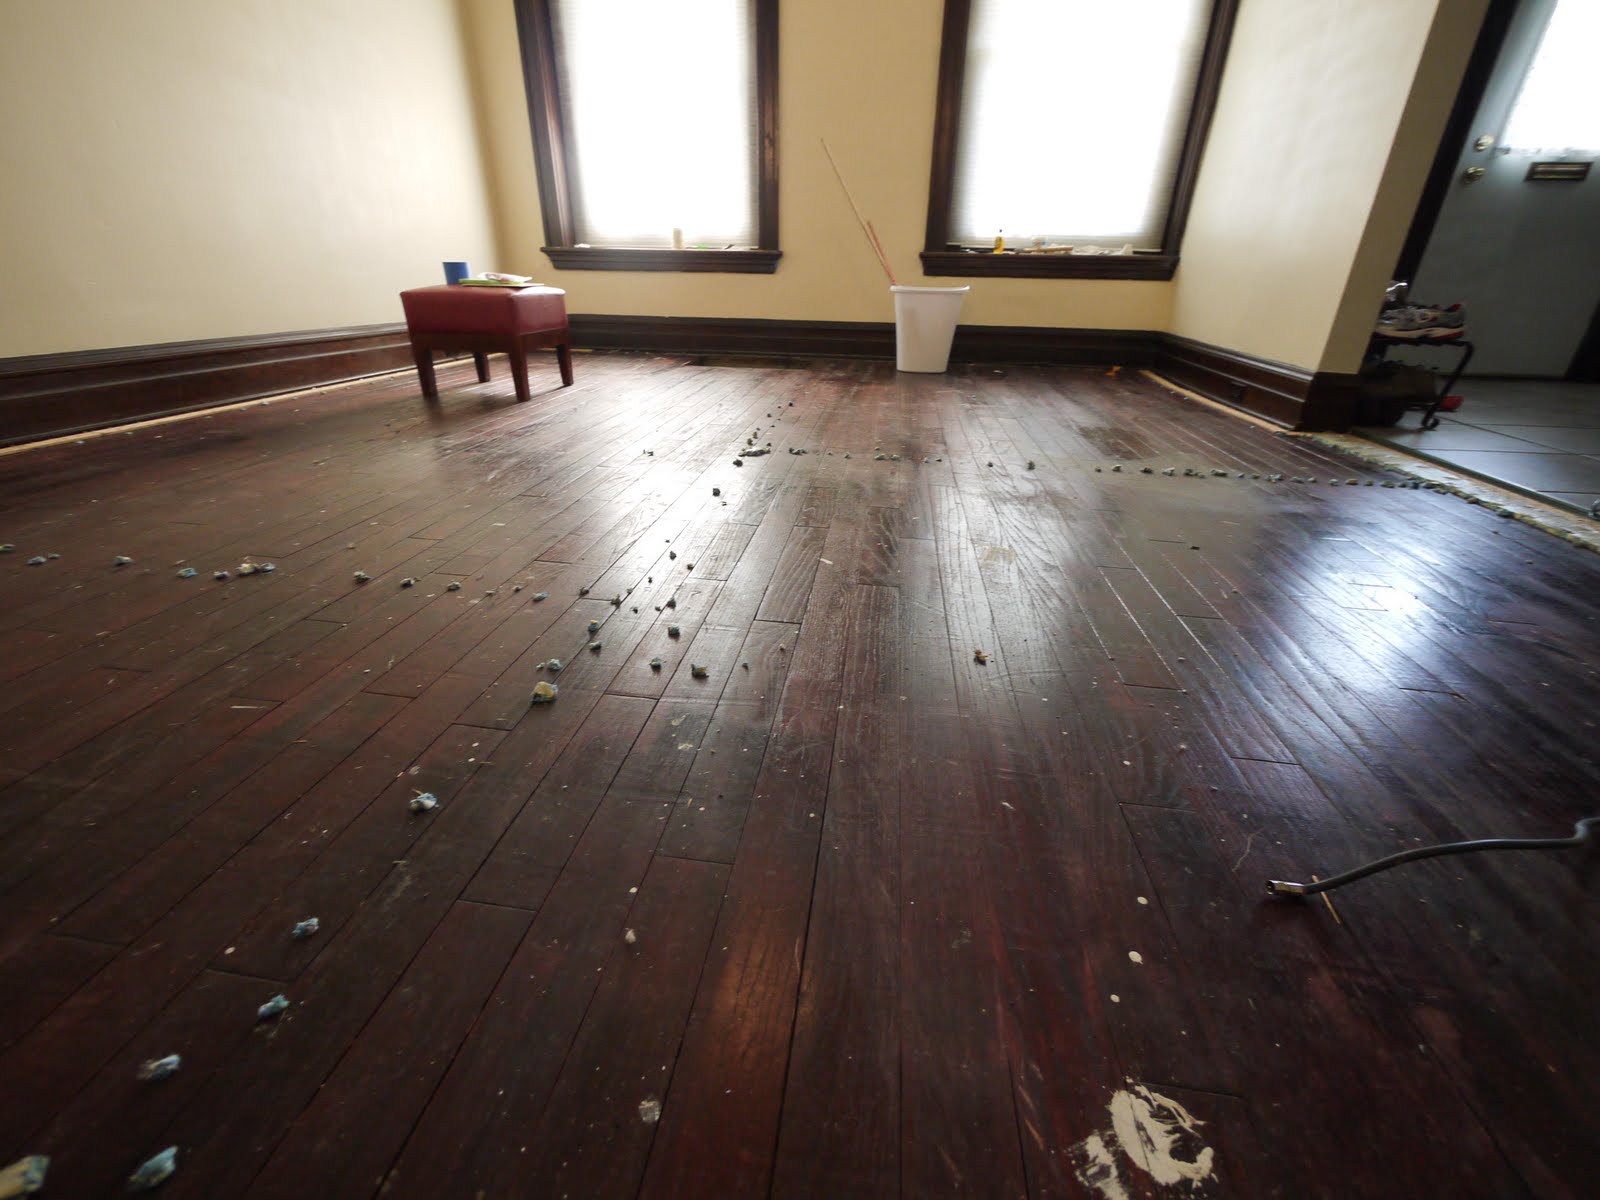
When we pulled out the wall-to-wall carpet on the second floor, we were thrilled to find out that the original 17-inch planks were still there, and in great shape. We were less thrilled that they were painted brown. Now, don’t get me wrong — in the grand scheme of things, it could have been way worse. They could have been destroyed and damaged, or painted a less-palatable color. So we were able to put up with the brown paint for about a year. But the floors were getting more knicked up by the day (the paint isn’t so great as a protectant), and our patience with the unfinished look was wearing thin.
We had previously gotten a too-good-to-refuse quote on refinishing them from the same guys that refinished our living room floor (TJ Hardwood Floors — we definitely recommend them for quality, reasonably-priced work). While it wasn’t cheap, the economies-of-scale made it more manageable (cheaper to do all of them at once than one at a time). Add the good price to the cost of my time and lack of expertise in refinishing hardwood floors, and we were definitely going to pay someone to do it for us.
The first step was moving all of the furniture around, after strategizing which rooms we’d tackle first (knowing we’d have to keep those rooms empty for about a week while the polyurethane cured, before swapping again for round two). That was a huge pain. But we got it done.
Next, TJ & his team got to work sanding. Which took allllllll day long. Really, I can’t complain, because I just went off to work while Alex worked at home to watch. But out of 8 hours in a day, approximately 7.5 went to sanding, while the final 0.5 was for sealing.

Sanding, in progress… there were many, many layers of paint.
Then there was more sanding. And more. And more. Also, some hammering (they did a few repairs along the way, but not many, especially considering we’re talking about 112-year-old floors). And finally, it came to sealing! Here’s where the magic happens.

Left: After sanding
Right: After one round of polyurethane
(as you can see it still needs more sanding & topcoats)
Sidebar: why did we go with no stain, and traditional (oil-based) polyurethane? Well…. we really wanted that rich, caramel color that comes from traditional polyurethane over bare wood. We definitely were more interested in water-based (no-VOC) polys (for environmental reasons, but also for smell — we stayed in a hotel one night the vapors were so bad), and we even did some color tests (see picture below). But you don’t get any yellowing with water-based. Which usually is a good thing (why would you want yellowing?), however when it came to getting the richness of color, oil-based was the way to go. In hindsight, perhaps we could have gone with a stain followed by water-based poly, but we feel like the floors ended up beautiful, so for now we’re happy with the choice.

Top: Bare wood with water-based sealer (Bona Waterbased Polyurethane)
Bottom: Bare wood with traditional oil-based polyurethane
See how the traditional oil-based polyurethane brings out more of the wood’s character? While we surely could have figured out a better way to use the water-based poly and get the same color, we thought this was the way to go.
In the end, we think our floors look fabulous! There are still plenty of imperfections (weird cutouts where we haven’t quite figured out the original point, more than a few knots, etc), but we love them that way.

Love them!