Tag Archives: dining table

New Dining Room Chairs

No, sadly this isn’t a “reveal” of how I finished reupholstering all of my dining room chairs. I still have yet to make it past the first one, and since I was out of town for work last week, I didn’t get much done in the way of dining room progress. Other than daydreaming about what I’d like the dining room to look like, and specifically about what chairs to pair with my homemade farmhouse style dining room table.

So I do like the newly-reupholstered-but-old chairs. And since I already bought all of the fabric, I will eventually go down the road of upholstering them all. Emphasis on “eventually”.

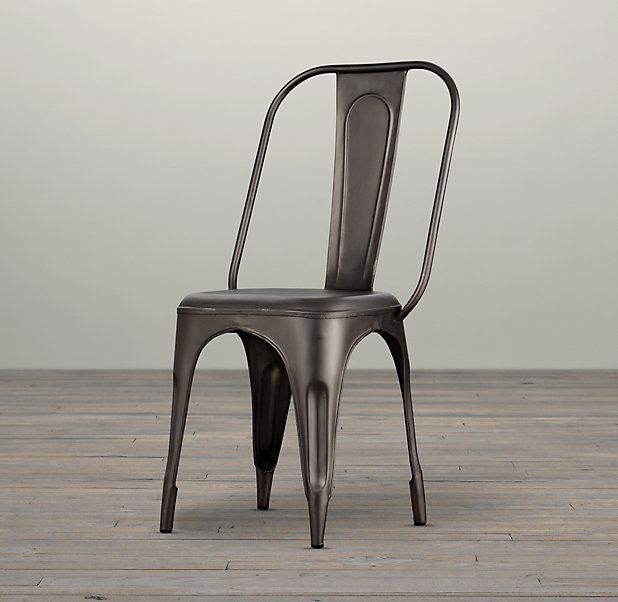
But I’m kinda obsessed with the Pauchard-inspired metal French bistro style chairs. Like this one, from Industry West, which comes in a rainbow of colors (I’m partial to this blue):

*Disclaimer: None of these photos are mine, but as always, I link back to the source on all of them. 

Or this one, from Restoration Hardware (why do I love their furniture so much?):

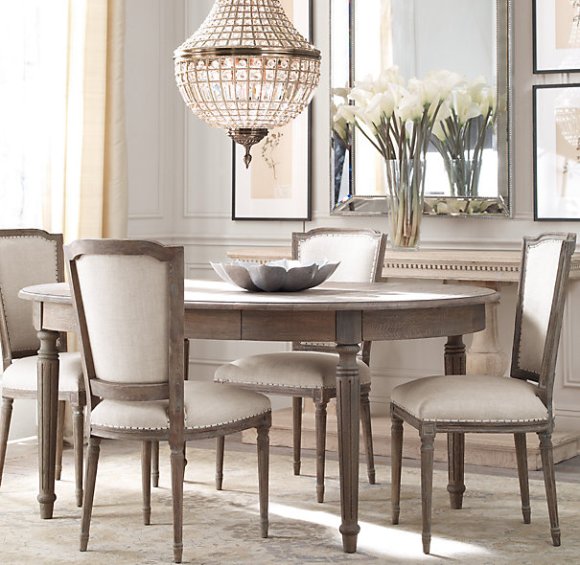
I think the contrast of the wood farmhouse table vs. industrial metal chairs could look cool, like the pictures below:

Or how about this one:

I don’t really need new chairs. And I do genuinely like the ones that I have, although they’ll get put to use no matter what (they are currently residing in various places around the house, as desk chairs or extra seating). As always I’m trying to stay away from going too “country” or too “historic” in my decor, hence the contrasting pieces where possible. Plus, let’s be real — I just like those chairs, and am looking for a way to incorporate them.

No idea what I’ll end up doing, just thought I’d put the idea out there … thoughts?

Tagged , , , ,

Building a Dining Room Table

So we mentioned how we botched a would-be rehabilitation of our former dining room table. And while we certainly plan on seeing that project through (we’re not giving up totally), because of previously made plans we DID need a functional, aesthetically pleasing table to use in two weeks, which is how I convinced Alex that we should build our own.

He was not really down with this idea. Or, in fairness, he was ok with it … eventually. But he didn’t want to do it RIGHT NOW, like I did. To put this in perspective — I came home from work Friday night with the stripper to use on our old table. Friday around 9pm we declared the stripping project a bust. Then, around 10pm, I said “We should build our own table this weekend”. I got a lot of eye rolls and groans, and more than one “Seriously? I just want a break”.

So when Alex called me on his way home from Saturday morning basketball only to find out that I was on my way home from the lumber store, he just resigned himself to the fact that it was happening.

First, I got the lumber. I chose poplar because it’s a softer wood, but still better quality than the pine / fir you can get from big box stores. That wood is  fine for framing and other purposes, but for building furniture, I wanted something a bit nicer (although I knew with my skill level, I wasn’t ready to graduate to oak, mahogany, cherry, walnut …. etc)

Because I was getting it from a lumber / specialty wood store, and NOT a Lowe’s or Home Depot, many of the boards didn’t come planed and in standard sizes. The pros of this included the ability to make the table a little more “rustic” (especially the planks on the top), but the biggest con was that we had to cut our own boards, which is a bit daunting. Also, the boards weren’t completely straight, again because they didn’t come planed. And not-straight boards usually makes not-straight furniture & joints. So that was tricky.

For a plan, I used some tips from both Ana White‘s book (The Handbuilt Home, “Farmhouse Dining Table” plan), as well as some parts from another table plan I found on her website. Basically I mixed and matched design components until I came up with something that would work with the boards that I had. In the end, it most resembled this design from Ana White’s plan catalog.

First, (well, second — first we cut all of our boards) we built the legs, which were two sections of 2×4 screwed & glued together, with strategic notches for the apron / frame and stretchers. We let them dry overnight (so the glue would make them nice and strong).

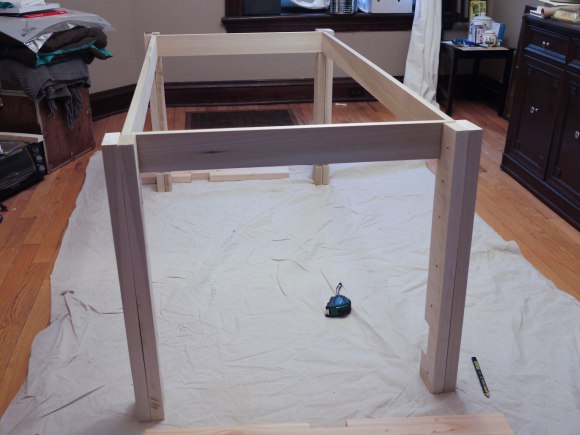
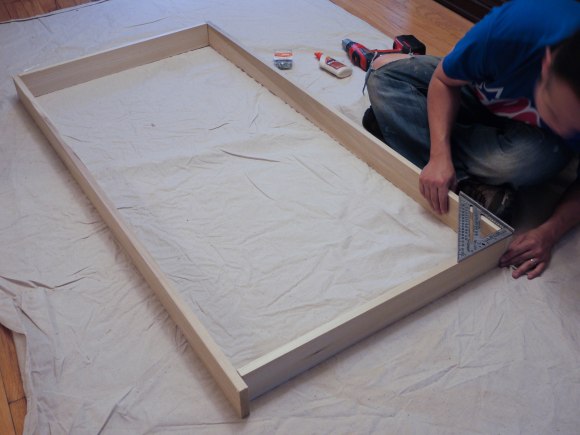
Then, the next morning we put the apron / frame together – this part would sit in the notches on the legs, and form the frame for the tabletop. All it took was a speed square to make sure things were lining up, some glue, and four screws … and bam! It’s starting to look more table-like.
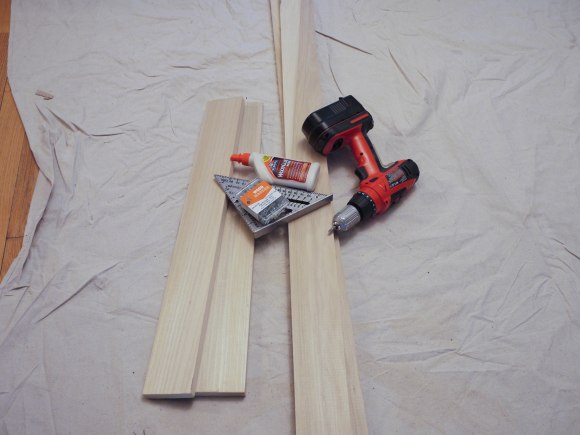
From here on out it was pretty smooth sailing — just a matter of screwing all of the pieces together; it wasn’t much more complicated than assembling some Ikea furniture (but we had to pre-drill our own holes). We attached the side strechers (those little ankle height pieces between the end legs), which had a notch for a length-wise stretcher.

I put in the frame supports for the tabletop, and then climbed on top of it to make sure it was structurally sound (check! it worked).

And finally, we attached the four wide tabletop planks together via pocket holes (no picture of this, we needed all of our hands) and a sweet Kreg jig, and it was a simple matter of screwing the tabletop down.

Voila! Table in 1.5 days.

The bottom stretcher looks crooked in this photo, but it doesn’t look like that in real life… I think because when I took this photo the whole table was a bit askew from the floor boards?

It’s huge (7 feet long), but we figured if we were going to go through the trouble of building it, we would make one that would be large enough for our pre-Thanksgiving gathering and any other future events. And we definitely have plans to finish it somehow, but we don’t know how yet (stain? paint? two-tone? just seal it?). Still, it feels really great to look into the dining room and see the table that we freakin’ built! It’s definitely not perfect, but it’s sturdy and, if nothing else, comes with a good story attached to it.

Tagged , , ,

Refinishing a dining room table

I’m going to warn you right now, up front: This is not a story of success. It is not a story of “wow, that was so easy!”. It is definitely a failure. But it’s proof that things don’t always go as well as we hoped. So with that said …

Making such a huge amount of progress in the kitchen gave us a major confidence boost. Not only did we feel like we could tackle these projects, but we realized that we enjoyed doing it, and we definitely enjoyed the results. So we’re on a roll.

One thing that I’ve wanted to do for a while is something, anything, about our hand-me-down dining room table. It came  as part of a set from my late grandmother, all of which are an ugly, “speckled orange” color. It’s solidly built, and I definitely don’t want to toss it. But I don’t know the first thing about refinishing furniture. I thought about painting it (which is how I “dealt” with the matching buffets), but I wanted a natural wood finish. During one of my many just-browsing-the-internet moments at work (on my lunch break, of course. Never during work hours!), I noticed this table at Restoration Hardware:

Image from Restoration Hardware

It has a very similar shape & lines to my dining room table, so I thought “Hmm, this is probably what my table would look like if I stripped it!”. I had a vague memory of what the table looks like (as I hadn’t seen it in a while — it’s buried under displaced objects from our kitchen renovation), but I was certain if I stripped the finish and stain, I’d be left with a table like this one.

So on my way home, I stopped to get some eco-friendly stripper (Soy Gel Paint Remover). Then as soon as I got home, I uncovered the dining table, and started putting stripper all over it. But as I was doing it, I noticed the grain.

Here is my internal monologue as I was applying the stripper to the surface

“Hmm…. that’s not what I thought it would be”

“It’s got these curly patterns in it”

“Wait, is that maple?”

“There is no way this entire dining table is made out of quilted maple. That’s too fancy”

But even though I was feeling uneasy, I persevered with the application. It was only while Alex and I were out and about later, while the stripper was working, that the nebulous worry finally formed into a conclusion. The table must have a veneer.  I didn’t know how that would affect my plans, but I knew things weren’t looking good.

So after the stripper had worked for a few hours (and in another situation, where I wasn’t sure of failure, I would have let it sit longer to work more), we started using our scrapers and wire brushes to remove the gel. Sure enough, the tabletop was definitely a veneer. A fairly thick one, but still a veneer. Plus, by checking out the unfinished wood on the bottom of the table (which we should have done before attempting anything), it was clear that no matter what we did, we would never get to the light Restoration-Hardware color we were looking for. The wood was always going to be orange. (although that gives me an idea… can I bleach it? I will google this …)


You can see the pizza-slice-shaped pieces of veneer on the rounded ends. Not what we were hoping for. 

We were dejected and annoyed. Plus, we had a jacked-up looking table (we’re still going to try to rehabilitate it, but that will take another, more thorough application of stripper, and either re-staining it or painting it, so we’ve got some work ahead of us). And in 2 weeks, we have 7 people coming for a pre-Thanksgiving celebration, so we need a table ASAP.

And so, because of this botched attempt at refinishing, and our need for a table soon, we decided to build our own dining room table.

Tagged , , , ,